MAY - GARDEN PREPARATION

Another month and another opportunity  to add to your guilt load with more gardening  reminders.

May  is the "do everything month," weather permitting of course. At some point in May you  might find yourself having to transplant, seed, fertilize, thin, weed and maybe harvest.  Although the "new" average date of the last frost  of the season according to New York State's Dept. of Environmental Conservation is now May 2  for much of Rensselaer County (excluding the higher elevations like the Rensselaer Plateau), gardeners need to monitor projected weather forecasts closely to plan their gardening activities because temperatures and weather can still wildly fluctuate.  So here is a little more about about some of those things you might find yourself doing...

  • First, is your garden soil ready for action?  Take its temperature.  Cool weather veggie seeds can go in the ground when the soil nears 40° F, but the soil should not be saturated.  The soil's moisture content is okay if, when you scoop up a handful, it does not remain in a wet clump in your hand, but looks somewhat like  a cup of streusel topping for coffee cake.  
  • If you have started cool weather veggies indoors (cabbage, broccoli, lettuce, etc.), you can  either  start  to "harden" them off outside   or to set them directly into the garden or into cold frames, cloches or row covers.  Hardening is really more about strengthening plant stems by exposing them to a little wind than it is about conditioning them to cooler temperatures.  In early May when it's sunny I simply  move my trays of seedlings into the garden  each day, then return them to the shelter of my cellar for the night.  
  • If you haven't already planted seeds in the garden in early May, you can still put in  a  planting of cool weather veggies. Peas, radishes, chard and lettuce have a good chance of beating July's heat. 
  • And, if you were able to sow seeds last month, it may be time  to thin them. It may also be time to cultivate/weed those rows.
  • Your early diligence of March and April might now be rewarded in late May by  your being able to harvest spinach, lettuce, radishes and peas. This is especially true if you used cold frames, cloches or row covers to get the first crops started. 
     Typical slug.  Source: University of MN

  • Unfortunately, as temperatures in May warm it is also  time to  start looking for slugs, cutworms and aphids.   Slugs are unsegmented invertebrates.  They look like snails without shells and are most active at night. Although you can  find them on the underside of leaves on some days, they like cool, moist weather and tend to shelter under thick mulch, bark, boards etc during bright sunny days.  I have noticed  in recent years that slugs  have become a common  pest in my garden. The slugs  feast on my young lettuce, cabbage and Swiss chard. I have tried  using diatomaceous earth  to control them, but  recent springs have been wet and cool making diatomaceous earth  less effective. I've also used half buried water bottle traps baited with beer. The slugs like the beer and drown happy, but beer's evaporation means that I have to replenish the beverage in the bottles frequently.  I now just keep a container of soapy water in the garden and do a slug patrol every morning.  This seems to work best in my small kitchen garden.  

    Black cutworm. Source: Clemson U.
  • Cut worms are another enemy you will encounter  when you set out seedlings. There are many kinds of them -- they are typically soil colored  ranging from tans  to  dark grays with  some sporting occasional   darker streaks.  Slugs seem to take up residence in the soil near wherever you plant your seedlings.  If you notice a young plant cut off as shown in the photo, you can probably locate the villain by scratching around the base of the plant.  Backyard gardeners can protect their young plants by placing a  collar around the base of the plant and inserting it about 1" into the soil.  When I was growing up, we used pages from the  Sears & Roebuck Catalog cut into strips to protect our cucumbers and melons.  Now, I cut circular collars  from yogurt cups.  


    Aphids.  Source: Cornell U.
  • Finally, aphids will start appearing from mid to late May.  These little fellows are sort of pear shape, frequently are green or white in color and usually smaller than a pinhead. Look for them on the underside of leaves.  They are true bugs in that they poke  holes in a plant's stem or its leaves and suck the sap.  Healthy plants usually are not affected too much, but aphids are attracted to overcrowded or otherwise environmentally stressed plants.   However, their piercings can introduce viruses into  a plant.  Their natural predators include ladybug lava and lacewings, but aphids' ability to procreate exponentially  tends to outpace  predator appetites.  If you need to intervene, you can spray a mild soapy solution on the plants, remove them by hand or simply hose them off. 


And remember...

"Gardening is learning, learning  learning." - Helen Mirren, British Actress
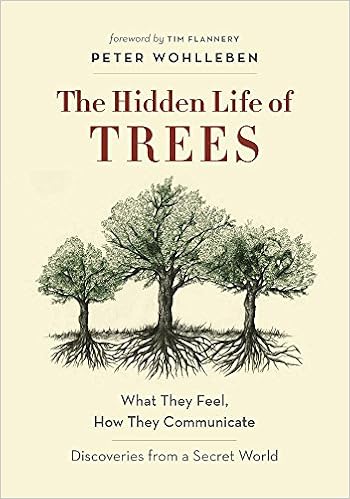


Book Recommendation - THE HIDDEN LIFE OF TREES


Yes, this post  is not about vegetables; it's about trees growing wild in the forest. 

If you like  fruits and nuts and/or have planted a tree or two in your yard, you might be interested in learning about what  trees know and how they cope with their environment.  You probably will not convert your front or backyard  into forest after reading this book, but maybe some of the ideas  in the book  will cause you to think about how to provide a better environment for the trees you have and, perhaps, even your vegetables...

Peter Wohlleben, a German forester, who still manages an old-growth forest of beech and oaks in Hummel, Germany, became an ecological rock star after his publishing of    Das geheime Leben der Bรคume   in 2015.  Like, probably, most of us he viewed trees as an economic commodity whose value was mostly determined according to the parameters of the U.S.  Forest Products Laboratory's 1974 Wood Handbook: Wood as an Engineering Material

That view  changed in 1987 when Wohlleben noticed what appeared to be moss covering strange looking stones around a dead stump.  Those stones turned out to be living wood of a very much alive stump.  That epiphanic discovery started him thinking differently about trees and ultimately led to the 2015 book. In his book Wohlleben explained how trees of the same species may share nutrition and communicate with one another in the forest as well as collaborate with fungi in the soil. The English edition of his book quickly followed in 2017 as the Hidden Life of TREES and immediately appeared in the New York Times' Best Seller List.

Wohlleben's simple, insightful writing style provides lay readers with information incorporating  scientific research of the last 30 years that indicates that there is a lot more going on in the forest than what most of us ever imagined - or, probably never really thought about at all. Trees (and maybe plants in general) do communicate with their kin and other beings - sometimes chemically, sometimes electrically via their roots, via the mycorrhizal network of fungi, and sometimes via the wind.  For readers interested in getting to some of the supporting research, key papers are included in the extensive footnote section at the back of the book.  Happy reading...

n.b. Wohlleben is currently on tour promoting a new work, The Inner Life of Animals  (Greystone Books, 2017).


JUMPING or CRAZY SNAKE WORMS


In case you missed this news last fall...

Source: Wisconsin DNR
There's a new problem loose in the neighborhood.   Sometimes called "crazy snake worms," "Alabama jumpers, " or  "Asian worms," there are actually at least three species of these critters: Amynthas agrestis (the  most often cited culprit), Amynthas tokioensis, and Metaphire hilgendorfi. They all look very much alike. They can grow longer than 8  inches and become very activated when disturbed. Not much is known about them, and there are no effective  control solutions at the present time.

Why are they a problem?

Home gardeners generally like to see earthworms in their vegetable gardens because they aerate the soil, turn it over, and add  compost. But worms are not good for the forest environment. Nearly all earthworms in the Northeast today are non-native. Both the familiar European varieties and these new Asian invasives  alter  forest soil structure and chemistry by consuming the critical layer of organic matter that supplies vital nutrients needed by native plants like wild flowers and other seedlings as well as also providing food, protection and habitat for native wildlife. The difference is that "crazy worms" out compete their European cousins and do their damage faster than forest soils can recover from their damage.

In areas of heavy infestation of "crazy worms," native plants, soil invertebrates, salamanders, birds and other animals may decline. The worms can also severely damage roots of plants in nurseries, gardens, forests and turf (grasses) making it easier for  invasive plant species to get established.  The eggs of jumping worms are very small and able endure cold winter temperatures. Although just reported last year in Rensselaer County, jumping worms are already widespread across much of the Northeast, Southeast and Midwest. 

Source: Finger Lakes-PRISM


Note  that  the  Clitellum is located near 
the head, milky in color, and of the same 
diameter  as the  worm's body.  
Source: Wisconsin DNR


What you can do.

You can help to minimize the risk  of spreading jumping worms by following the these steps:
  • Do NOT buy or use jumping worms for bait, vermicomposting or gardening.

  • Only sell, purchase or trade compost that was heated to appropriate temperatures and duration following protocols for reducing pathogens.

  • Clean compost, soil and debris from vehicles, personal gear, equipment, and gardening tools before moving to and from sites.

  • Check your property for earthworms using a mustard pour (it won’t harm your plants!) Mix a gallon of water with 1/3 cup of ground yellow mustard seed and pour slowly into the soil. This will drive any worms to the surface. If you have jumping worms, report it and avoid moving plants or soil from your yard.

  • Be careful when sharing and moving plants. Always check for worms and know where your plantings come from. [Don't be afraid to ask about jumping worms at nurseries or big box stores.] Buy bare root stock when possible.

  • Dispose of all live worms in the trash or place them in a bag and leave out in the sun for at least 10 minutes. Then throw bag away 


If you see jumping worms, please report your sightings to New York iMapInvasives


Note: Portions of this text have been adapted from Cornell University's Cooperative Extension's Invasive Species Factsheet on Jumping Worms

Crop Rotation and Cover Crops


Crop Rotation in Middle Ages
Source: tenthmedeival.wordpress.com
For millennia farmers have recognized that soil fertility declines as the same fields are used for the same crops year after year.   Over generations and in different cultures, crop rotations based on two, three and four year cycles evolved as a way to keep soils  productive. [If you remember anything from middle school World History, it's probably  that during the Middle Ages the serfs let  one field lie fallow every third season.] Serfs then,  and farmers  now, also   spread animal   manures on fields as  fertilizers. 

Today, backyard  vegetable gardeners with either  just a small, single raised bed or a large fenced garden  try to avoid planting the same vegetables in the same spot year after year.  They know that it is a way to minimize the presence of some insect pests and plant pathogens. Most of these gardeners also  add compost and other fertilizers to sustain soil fertility, but   they may or may not follow  systematic crop rotation and may not use cover crops as part of their garden planning.  So let's try to make a case for  both of these activities...


-----------------------------------------------------------------------------------------------------------

Our favorite backyard vegetables, like tomatoes and peppers, and some grains, like corn, have  relatively large appetites for nutrients. Because the root systems of many popular vegetables are relatively shallow, garden soil can become depleted of some  nutrients near the top of its upper  layer (i.e. the soil's A Horizon).  Adding compost  does return some of these nutrients to  garden soil, and the new organic matter  also promotes soil aeration and  helps to retain moisture.  Typically,  dressing a vegetable garden with about 2" of compost annually will do a lot to sustain its fertility.  Mulching also contributes organic matter and should be considered to  be part of the "compost picture." Few of us, speaking from experience, probably add either enough compost or mulch each year to our vegetable beds,  but every little bit   helps...

Source: growers learning.com
 If you don't  have a lot of your own compost, you can buy compost, but probably many gardeners simply yield to the cheaper temptation and supplement soil nutrients for another year by opening  a standard 5-10-5 bag of  synthetic fertilizer. Eventually, use of synthetic fertilizers will lead to a decline of "soil organic content" (SOC). Without new organic matter regularly being added, the diversity of garden  soil's microbial ecology simply declines (fewer types of bacteria and other  lower order critters, i.e. invertebrates  exist there).  It's these creatures that account for the breakdown of  organic matter that releases a fuller range of plant nutrients  into the soil.

Although adding compost is very important for soil fertility, unfortunately, compost alone is not quite enough.  Backyard gardeners also should systematically rotate crops and  use  cover crops in order to sustain and improve  soil fertility and texture.  [It will also get you a long way towards following really recommended  organic practices in your garden.] Together with adding compost, these two other actions will enable you to break  synthetic fertilizer addiction.


Crop Rotation


The above illustration shows a modern four year sequence of vegetable rotation in a garden plot.

NOTE: The four year cycle   evolved in 16th century Belgium  and involved rotating legumes, root   vegetables (e.g. a lot of turnips), grains,  and a fallow season of no planting. The modern  four year pattern for  backyard gardeners became popularized in the U.K. starting in the 1920's and  emphasized the importance of regularly incorporating  organic matter  into  soil to promote its  fertility.

What the modern  plan achieves is that 1) legumes replace depleted nitrogen sources, 2) root veggies  penetrate deep into the soil and move some nutrients upward,   and 3) the cycle provides  four years of usable crops with at least  a three year gap before a plot might be used again for the same crop minimizing the risk of a  crop's   exposure to  particular pathogens or insect infestations. Of course, adding compost to replace organic matter  is implicit for every year. An excellent resource about practical rotations is North Carolina State University's Center for Environmental Farming Systems publication, Crop Rotations on Organic Farms.

HINT -  Rather than pulling up bush beans, tomatoes, peppers etc. at the end of the growing season, cut them off at ground level and let their root systems decompose in the ground.  It will help keep the soil from getting compacted, leave some nutrients in the ground AND may save your back from spading...

Cover Crops


Cover crop in raised beds.
Source: paoniafarmandhome.com
For farmers, cover crops do a lot. They are used to suppress weeds, reduce erosion and compaction, add organic matter, improve soil structure and restore nutrients to name just a few benefits.  For  backyard gardeners, the benefits probably  focus mostly on adding nitrogen sources and extra organic matter.  

There are actually two seasons for planting cover crops. The first season spans early spring to early summer and  usually involves planting buckwheat, clover or a legume like a field pea. These crops grow fast allowing time for a late season crop to be planted. The second season spans late summer to early fall and frequently  involves sowing oats, field peas, or ryegrass to provide organic matter for the next season. These crops typically have deeper root systems than vegetables and bring nutrients up closer to the surface as well as adding organic matter.

I've only mentioned a few of the available cover crop options that farmers might select to improve soil.  For  backyard gardeners, using cover crops in late summer or early fall probably is the more practical option.   Either ryegrass (not winter rye) and buckwheat are  good choices  because both are annuals and can be  worked into the soil easily before they go to seed. Some gardeners  use winter rye, but it requires more effort to work it into the soil in spring after its sprouts.  For a lot more information on cover crops, consult Cornell University's Cover Crops for Vegetable Growers  website. 

Finally, for gardeners who might be interested in knowing what being an "organic  farmer" entails as well as useful information about organic farming practices, I recommend the U.S. Dept. of Agriculture's Guide to Organic Producers. This is set up as a workbook and checklist for  prospective organic farmers, but  backyard gardeners will learn a lot just be looking through it,  too...


-----------------------------------------------------------------------------------------------------------------

Source: earthwiseradio.org

About Animal Manures 

Applying animal manures to a garden can be  a  very effective way to sustain soil fertility. Organic and conventional farmers  frequently incorporate manures into their  field management strategies,  but for backyard gardeners with limited space and maybe limited access to manure sources it can be more challenging.  For a gardener with a small, e.g. 4' x 8', plot, a commercial bag of manure from a garden center etc. is attractive because the manure already has been  composted, sterilized and rendered safe from pathogens and viable weed seeds.

For a person with a larger vegetable garden, this approach is not especially economical and makes the offer of  getting fresh manure from a neighbor's pet chickens or rabbits  appealing, but it requires more thought than just saying, "Yes, I'll take all you've got."

Animal manure should be composted before being spread on the backyard garden.  If not composted, then its best to dress it either onto a fallow plot or to till it into a  bed at the end of current the   growing season so that it will decompose over the winter. In its fresh state manure can be simply too concentrated for plants to handle. For example, there may be too much nitrogen, it might be too acidic, it could contain lots of weed seeds or a pathogen (e.g. worse case: salmonella)... Or, maybe it'll be just too smelly for your backyard.  For both commercial as well as neighborly sources of  "brown gold," either check the label or ask about how "organic" the manure is.  Unless you are getting manure from an organic, or at  least, a hormone free source,  you could  be inadvertently  adding some extras like animal antibiotics to your garden's soil. 

Finally, the manure's animal source  is important to know because nutrient content varies.  Chicken manure is generally considered desirable because it contains relatively high amounts of nitrogen and potassium compared with other manures; on the other hand,  like cattle manure, the fresh variety also contains a lot of ammonia that potentially can damage plants if over applied.  Cattle manure contains a lot of organic matter and a wider range of nutrients  (as well as weed seeds), but it requires about a year to decompose. Horse manure is similar to cattle manure in content, but can take up to two years to decompose -- making it a slow release  fertilizer.  Simply do not use pet feces - the risks of exposure to parasites and harmful bacteria are too great.  If you plan to use animal manures in your garden, it's a good idea to follow the guidelines of the  National Good Agricultural Practices Program available from Cornell University's website.  It is very, very  important to know when to add manures and how to apply  them safely in your garden. 


And remember  (maybe)...


"Creating your own urban farm is as simple as planting your flowerbeds with edibles." ~Greg Peterson


Vegetable Varieties for Gardeners (VVfG)

Big Yields in Small Spaces


VVfG is a citizen science project developed by Cornell University's Cooperative Extension to collect and share data about growing vegetables in New York State. Last year, Rensselaer County Master Gardeners were invited to join the project. 

With a few adjustments to our Demonstration Garden Vegetable plot located at the Robert C. Parker School on Route 43 in Wynantskill, NY, we dug in. We created 10 raised bed areas, with most being about 4 ft by 4ft. Nine were planted using Cornell’s recommendations, the remaining bed contained garlic from the previous year. 


Cornell provided the plants and seeds. All beds had both a Spring and Summer planting, And two beds had Late Fall cover crop plantings and one bed had garlic. Employing the “square foot “method we grew around 40 different varieties, including edible flowers and pollinator beds. After tasting and rating the vegetables, produce was donated to local food pantries and data was added to the Cornell database.


Demonstration Garden
So this year, our group has decided to plant four of the beds using Cornell’s recommendations. The other beds will be planted using other varieties. We hope to gather and share as much data as possible to inform our Rensselaer County friends, as well as anyone else out there about our experiments.

After all, that’s what gardening is all about: trying something new and seeing what works. More details to follow.


Submitted by Nancy Scott, Rensselaer County Master Gardener


HOW TO PROTECT SEEDLINGS FROM DAMPING-OFF

Probably a lot of backyard  gardeners by now   have put seeds in pots, trays or some other kind of container. After anxiously waiting for the little sprouts to poke out of the soil, they are excited to see the first two leaves open, the cotyledons. The gardeners provide a little more water  and  maybe rotate the trays so that the new sprouts share the light.  Like the gardeners, the new sprouts must be  happy. What could possibly go wrong?  

Damping-off. Source: Cornell University 
There's actually a lot,  but most probably  a gardener will go down into their cellar or out onto an unheated sunroom one morning to check on the seedlings and find them sprawled over  with their stems looking pinched and maybe their leaves starting to look discolored.   Pulling up one of the shoots the gardener notices that its roots have not developed very much. What happened?

Looks like damping-off (or damp-off)  to me. 

Damp-off is  typically  caused  either by one of two fungi:  Fusarium spp. and  Rhizoctonia spp. or by a Pythium spp. ["spp" stands  for subspecies]. The latter is a water mold and is recognizably distinctive  because of its tiny white filaments. A microbiologist would say that it's distinguished  from fungi by being diploid (i.e. having 2 sets of genetic material rather than  being haploid like fungi with only 1 set). The two fungi may or may not appear with some kind of obvious fuzz, but infected plants will show various discoloration, and sometimes seeds will not even emerge from the soil.


Damp-off in early spring garden.


All these pathogenic critters are generally present in garden soils just waiting for the right conditions, like the ones some gardeners inadvertently  provide, to spring into action.   The pathogens do not normally have much impact on maturer plants, but they can. For example, the Irish Potato Famine was caused by a water mold (Phytophthora infestans). It commonly shows up at the end of  summer or during autumn as "late blight" when the weather turns cool and  wet.

Gardeners may not  care much about whether  a fungi or a water mold  did  in their  tomato seedlings, but they do need to know how to avoid the conditions that trigger "damp-off." The peppers in the pot of the first photo either were not in a sterile pot  or in sterile  garden soil, perhaps both. The second photo shows the result of someone in a hurry to get seed in the ground and not waiting until the soil was a little drier and/or and a little warmer,  On the other hand, maybe that gardener was just unlucky and hit a really bad streak of spring weather. Obviously, gardeners cannot control the weather, but here's what they can do next time to reduce the risk of pathogens from winning.

  • Clean gardening tools and wash your hands before handling seeds or seedlings if you have been handling unwashed tools, pots and other containers.
  • Use a heat mat under your tray or pots to keep soil temperature in the low 70s° F.
  • Invest in sterile starter or planting soil.  Don't use soil from the garden.
  • Wash and sterilize  trays and pots before use. Soak'em in a 10% solution of household  bleach.
  • Don't overwater and make sure pots and other containers have drainage holes.  Seedlings  like to be moist, but not drowned.
  • When watering, use  warm tap water to promote root growth. Roots do not enjoy  cold baths.
  • After the first 2 - 4 true leaves develop (not the very first 2 leaves, the  cotyledons), recheck the potting mix's label because  many starter mixes contain slow release fertilizers at the right strength.  If they do, don't fertilize.  If you have to add fertilizer, then add it at no more than 1/4 strength.  
  • Look for excessive condensation on the inside tray or container covers. If moisture is dripping down, remove the covers, shake off the condensation and allow for more air flow. 
  • Provide 12-14 hours of light each day from either a soft white fluorescent bulb or a grow light. 

Remember that you are creating  a  nursery for young plants, and the seedlings will benefit from whatever  head start you take care to provide...


ROOT CONCERNS -  A HORTICULTURAL NEWSLETTER


Root Concerns, a gardening newsletter produced by the Cornell Cooperative Extensions of Rensselaer, Albany, and Schenectady Counties, is distributed free via email. Issues usually cover a potpourri of topics from (as in A Horizon, the top level of soil) to Z (as in zygopetalum, a type of orchid).

The current issue of Root Concerns includes articles about witchhazel, maple syrup, oak wilt, kale, and gardens in New Zealand and Alaska. To view the current issue click on this link,  March 2018.

To subscribe to the newsletter just register with Marcie Mohnoutka via  mmp74@cornell.edu at the  Rensselaer County Cooperative Extension and request that your email address be added to the distribution list.

You can also peruse the archive of Root Concerns' back issues from a link in the  Related Resources list located on the  right side of this blog page.