Showing posts sorted by relevance for query soil temperature. Sort by date Show all posts

SOIL TEMPERATURES  IMPORTANT FOR SEED GERMINATION

In early spring excited gardeners like talking about the "growing season"  characterizing it as being wet, dry, cold, warm, early, late, etc.  But what exactly is a "growing season"? A "growing season" is  commonly recognized as the average dates between the last frost of spring and the first frost of autumn  delineating the span of time  plants have to complete their annual growing cycles. 

In most of Rensselaer County, the historical growing season covers about 150 days. Recent data  from the US Environmental Protection Agency shows that New York's growing season since 1970 has increased to around 160+ days. This means that our favorite vegetables have ample time to sprout, grow and  be harvested because most of these vegetables complete their growing cycles within just 85 to 120 days. The downside is that the longer season reflects the effects of global warming that also may bring more extreme weather events such as heavier rainfalls, higher temperatures in summer, and the arrival of new pests from southern climes -- things that vegetables don't like.

Home gardeners, however,  need to focus on more than just that last  frost in order to get a head start on either spring or their neighbors.  Some other important factors affecting a given year's "growing season"  include air and soil temperatures, rainfall patterns and soil moisture as well as light levels to name a few.  Of these, air temperature is arguably the most critical factor as it  provides the energy (i.e. heat) that determines  a plant's germination and growth rates.

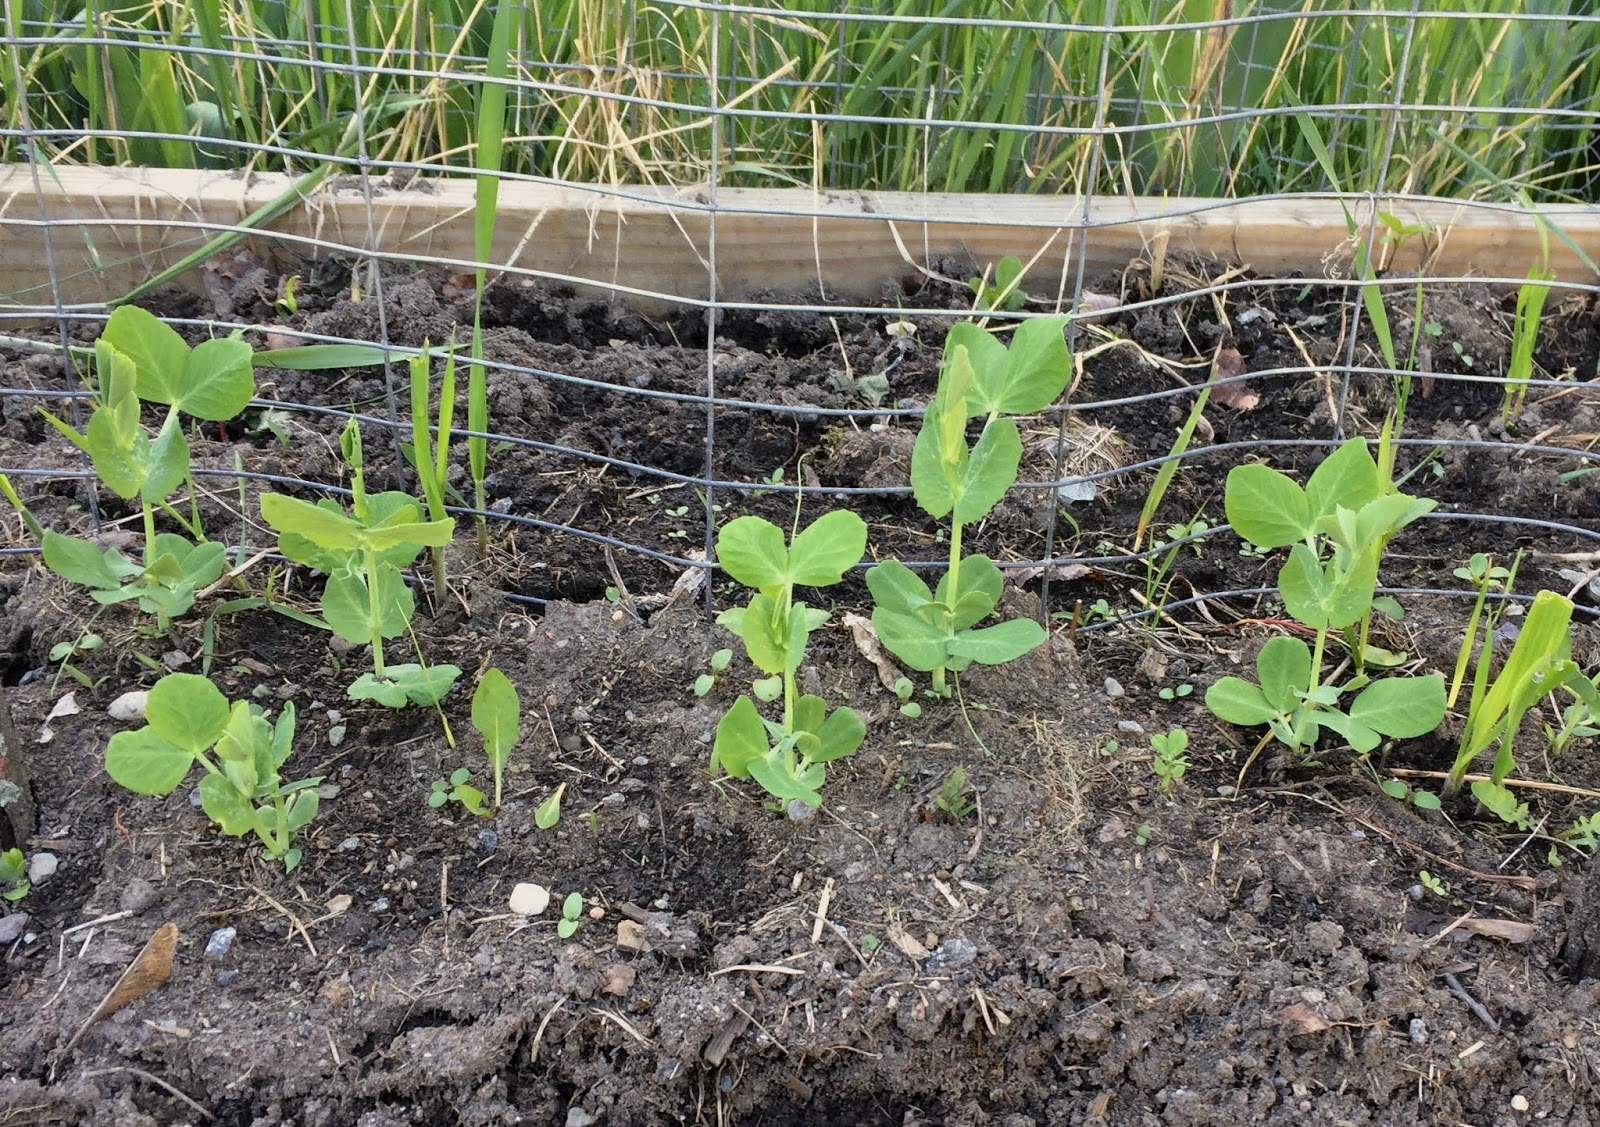
Cool weather vegetables such as peas, spinach and radishes will start to germinate in soil temperatures around 40°F, while warmer weather crops such as bush beans, cucumbers and squashes germinate at soil temperatures starting at around 60°F.  The two charts below clearly illustrate these differences in seed germination requirements.

Sugar snap pea. Source: Johnny Select Seeds


Bush bean. Source: Johnny Select Seed

For both peas and bush beans, optimal seed germination occurs at distinctly warmer soil temperatures than threshold temperatures, germination rates increase up to a peak soil temperature and then decline eventually ceasing as soil temperatures exceed the optimum point.   Seeds planted at or near their peak germination temperatures  sprout faster and may emerge within only a few days. Seeds planted at threshold gemination temperatures will take longer (e.g. a couple of weeks or more) to germinate   and emerge because their chemical activities, although triggered,   are occurring  at  much slower rates.  This means that it may not be advantageous to put seeds in the ground at the earliest possible time if   air temperatures are forecast to remain around  germination threshold levels.

Home gardeners also need to note that seeds of different vegetables  respond differently to soil temperatures that are too cool or too warm for germination.  Radish and parsnip seeds can be planted in soils below their threshold germination temperatures. They will just sit and wait until soils warm up.  Bush bean seeds planted in soils below their germination threshold run a high risk of never sprouting and just rotting as their seed casings soften from soil moisture.  In summer, high soil temperatures near the surface will cause some plant seeds, e.g. many lettuce varieties, to go into a dormant state. 

Measuring Soil Temperature

I use a metal bulb soil thermometer to check soil temperatures in spring before planting seeds or setting out seedlings.  You can also use typical household thermometers as long as their scale goes down at least to 32°F, but you may have to use a screwdriver or small trowel to soften the soil before inserting  those plastic models into the ground.  I measure  soil temperature at a depth of 6."  Soil temperatures will be warmer, of course, closer to the surface which will be better for seeds, but I am looking for temperatures that roots will like after the seeds have sprouted.

Metal bulb soil thermometer
After  seed germination and young plants emerge, air temperature becomes the critical factor in regulating the rate of plant growth and development.   Most vegetables thrive in temperatures akin to comfortable room temperatures,  i.e. between 60° -  80°s F with 78°F frequently mentioned as being the sweet spot.  I recommend gardeners consult Cornell's  Home Gardening Vegetable Guide for information about growing most garden vegetables.  And for now,  let's just note that for vegetables, in general,  their growth mostly ceases when air temperatures reach and/or surpass the mid-90°s F.  More about plant growth, temperatures and GDDs (Growing Degree Days) will be covered in future posts.


WATERING VEGETABLE GARDENS & MOISTURE LEVELS


Everyone knows that plants need water, but over watering is potentially  as bad for plants as under watering.  House plants probably are at greater risk from this than  veggies in the garden because soil drainage and atmospheric evaporation   ameliorates many beginning gardener mistakes.  But let's review some basics for everyone anyway.

How much moisture:  The gardener's  old rule of thumb is that vegetables typically  need the equivalent of 1" of rain per week in order to thrive. That level of watering goes a long way to give veggies  a steady moisture level assuming your garden's soil type is loamy and includes a sufficient amount of humus (the organic components in soil that significantly abet water retention).   


For gardeners following Mel Bartholomew's Square Foot Gardening (SFG) regimens of measuring water in cups per square foot but who compromise and secretly use a hose, a standard garden hose with an adjustable wand attachment set to the "gentle shower" level or its equivalent delivers a cup of water  about every 3-4 seconds.  For those who may not be familiar with SFG, many veggie gardeners I know, including myself, consider this book to be probably the best guide  to growing in backyard venues for both new and experienced hands. Although  2013 volume is the latest edition, any second hand copy fills the bill...

Soil type or texture: The basic composition of garden soil plays a major role in how water is retained.  There are three basic soil types: clayey with the finest particle size, loams with mid size particles, and sandy with the largest size particles.  Water tends not to permeate readily  into clay soils; you will probably see it quickly pooling and/or running away on the surface from your veggies.  In sandy type soils, water drains through quickly, and so these soils tend to dry out quickly.  For loamy soils, the goldilocks of soils, water will permeate into the soil at a moderate pace giving plants more time to absorb it.  But, in all three cases, it is the  organic residues from bio decomposition that hold soil and humus particles together into various sized clumps promoting both the soil's aeration and water retention qualities. 

  fwiw: Humus only accounts for 2 - 5% of the solid weight of garden soil.

If your garden's soil is either clayey or sandy, you will need to adjust your watering frequency and amount to approximate that ideal state of 1" of rain per week.  Probably, the best approach is to  invest in a moisture meter (about $10) that will let you check the moisture of your soil at different depths.  (These meters  indirectly measure the soil's water content as reflected by conductivity. Low readings indicate low water content; high scores indicate more water.)

But, you might just want to get some idea about how fast water drains through your soil by doing your own simple percolation test.  Dig a small hole about 8 - 12" in diameter and 8 - 12" deep. Fill the hole with water and let it drain out over night to moisturize the surrounding soil. The next morning, refill the hole with water, then measure the water's depth and every two hours thereafter.  Ideally, the water level should recede about 2" every hour, but a rate between  1" and  3" per hour is okay.  

Although germinating seeds  will be just looking for moisture in the top 2" for a short time, your tomatoes, for example, at mid-season have roots that  penetrate at least 8 - 10" into the soil. When their fruit is ripening, their roots will be 18 - 24" into the soil, and you need to apply water frequently enough for it to soak down to that level.  Watering until it runs off  surface areas or pools are not necessarily  reliable indicators of sufficient watering.


Mulch, Compost and other tactics:  Soil texture and humus content are only a couple of factors affecting soil moisture level.  Other important components of the "hydrologic (i.e. water) cycle" impacting soil moisture include transpiration, evaporation, runoff, condensation and, of course, precipitation.  Some gardening techniques can be used to improve and/or stabilize moisture levels to lessen the impact of water loss from these processes.

We've already mentioned how adding biomass (via compost) into soil helps to retain water.  Mulching is another obvious technique, and your compost  can also be used as a mulch. Straw, grass clippings, shredded newspaper (albeit, messy) or leaves, or peat moss  added to the top of the soil both  insulates  against the extremes of heat or cold and also  helps soil to hold moisture by  reducing the rate of evaporation.

Reminder: Sawdust and tree bark are not ideal mulch choices because the bacteria that will be decomposing these very woody ingredients will compete with your vegetables for  the soil's nitrogen. Pine needles are not a good choice either because they can slowly increase acidity; it's better to save them for your blueberries or, better yet, your rhododendrons.

In clayey  or compacted soils, as mentioned above, water tends to runoff  instead of soaking into the soil.  You can counter this to some degree by creating raised  beds or raised rows and amending this soil by adding sand along with humus. [The larger sand particles, when they clump with bio residues from decomposition, allow for aeration and hydration of the soil.] Another tactic to  counter runoff loss is by creating  small, shallow furrows for your seeds or seedlings so that some water will collect and  gain extra time to permeate into the soil.

How much mulch is enough? 3 - 4" will reduce evaporation and insulate as well as suppress some weeds, but 6" would be even better.  Actually, even lesser amounts of mulch help --  just 2" of mulch will lower soil temperatures by a few degrees.  Recently, my  appreciation for mulch's insulating power  was reinforced.  On May 26 the thermometer read 90°F in my backyard.  I measured the soil temperature at a depth of 5" under a 3 - 4" layer of straw.  The soil's temperature was 72°F.  I also had a 4' x 4' bed without mulch (I had run out of straw) and its temperature at 5" was 78°F !  I also have a bed with just 1 - 2" of mulch (I was  running out of straw), and its temperature registered 76°F - a little better than the bare soil's. - - I need to add   mulch to these beds, obviously. 

How & when to water?  There are many ways to give plants a drink -- by hand held hoses,  watering cans, soaker or drip hoses and sprinklers as well as elaborate  timed and moisture metered systems. Your choice is probably determined by the size of your garden, your personal calendar and, of course, your budget.  I  have nine raised beds, and just run a hose through a PVC pipe under a short section of lawn to the garden. Then I water each bed as needed using a long necked wand set on "gentle shower" and water at the base of plants.  I don't mind the time I spend watering because so far:
  1.  I like being in the garden,  and 
  2.  I like being in the garden especially in the morning.  
Soaker hoses  do appeal to me. The prospect of setting up all those separate connectors between beds, getting a timer ($30) and installing hoses (200+ ft) has so far successfully detoured me from  seriously investigating  soakers.  Also, as long as I can induce friends to garden sit for me when I'm traveling, I probably will continue to avoid the issue...


I try to water in the morning,  like the good gardener who I am pretending to be,  so that any water that gets on the leaves has a chance to evaporate during the day. Watering in the evening is generally not recommended because cooler evening temperatures combined with wetted leaves can promote the growth of molds and other plant diseases.  However, I admit that it does sometimes rain at night, and plants usually seem to come through okay while lacking umbrellas or slickers - except at the start or end of growing seasons when temperatures can be a lot cooler.

Soaker hoses deliver water to the base of plants. 
Surface connectors between beds are the simplest 
way to connect multiple beds.
Watering at high noon also is not recommended. Soil evaporation and plant transpiration rates are higher, and plants are stressed by trying to cope with water loss. They are losing water through their leaves faster than their roots can absorb it from the soil.  Watering your garden at 12 Noon with the temperature at a sizzling 93°F doesn't necessarily  help the plants much because the water spraying from the hose is probably around  55°F.  This may cool the soil a bit, but the roots' absorption rate actually slows down  with the lower temperatures.  If you have stored water, e.g. rain barrels, you can use it because that water's temperature will be close to ambient temperature.

Using lawn sprinklers for watering is less desirable than even just aiming your hose at the garden from a distance  because of increased losses from evaporation during the water's short flight in the air and from droplets that collect on plant leaves. Plus, lawn sprinkler patterns always  mis-direct  some water outside of where it's needed.    I know, if you're in a hurry and/or tired,  setting up a sprinkler in the middle of the garden is hard to resist.  The sprinkler does deliver needed water; just realize that it's not efficient and  that only a brutish sort of fellow gardener will  criticize you for it.

Source: swmm.info.uk
Ollas - a traditional clay pot watering system: For those who might be on a well water system and worried about pumping your supply dry, ollas might be an option.  Ollas are porous clay pots (unglazed) without a seep hole in the bottom that are buried in the ground  near your plants. Water gradually passes through the walls of the pot keeping the soil moist at the root level. This is an ancient technique used in very dry areas. I haven't tried it yet, but I might experiment  with it this year for my pole beans.  Last year I tried burying plastic soda bottles with tiny holes punched in the sides to let water gradually out, but my top seals were not intact and no vacuum was created.  Result: the water leaked out too fast... Using clay pots, you don't need to worry about vacuums... If I remember to try ollas, I'll report back later in the year.  [Or, if anyone reading  this post has experience using ollas, I hope you'll submit a comment.] Additional information about making your own ollas is available from the Global Buckets website.  


And remember...

"There's nothing like listening to a shower and thinking how it is soaking in around your green beans." -- Marcelene Cox 


PLANT PHENOLOGY & GROWING DEGREE DAYS   


In previous  posts we've discussed the importance of soil temperature for seed germination and have only briefly mentioned  the importance of air temperature as the furnace fueling plant growth.  Now, we'll spend  a little  time discussing why farmers (and probably only a few gardeners) are  interested, or should be interested,  in  closely tracking  the heating effects of daily air temperatures.

For most backyard gardeners just checking the planting directions on the back of a seed packet and noting that their favorite veggie matures in 67, 75 or 104 days probably fills the bill. Seed packet information usually summarizes how long a plant will take to develop within a region's growing season assuming average temperatures and moisture levels.  But plants do not, of course, develop at  constant rates after their emergence from the soil.

Source: intechopen.com
Their growth, photosynthesis, transpiration and enzymic activities - all occur at different rates given daily temperatures and lighting conditions,  but the growth of a plant's shoots, stems and leaves is mainly what we notice.  The chart to the right shows these differences in a plant's activities with respect to temperature. Although the temperature scale is not noted on the x-axis, the scale on the left side most likely starts at 50°F (below which most vegetables do nothing) and goes up to the high 90s°F on the far right side (when their activities mostly cease).

A plant's growth is  obviously sequential: a seed germinates, then the first  cotyledons appear, followed by the first true leaves,  then more leaves, budding, flowering etc.  Each of these stages only develops after a certain amount of heat has been received by the plant.  By tracking how much daily warmth has accumulated after planting a crop and monitoring weather forecasts, a farmer can  fairly accurately predict how quickly  a crop is developing.  This is important not just for predicting when to reap the harvest, but also for  knowing when to fertilize or when not to apply an insecticide etc. In fact, for farmers, the monitoring of Growing Degree Days (DDs) to anticipate when pests are going to show up is probably more important than knowing when their crop is going to develop its 3rd set of real  leaves.


Wonkish Break #1:  The identification and study of the stages of  plant life are part of phenology, the study of cyclical plant and animal activity in response to  weather and climate.  Other examples include bird migrations, insect hatching and the appearance of certain diseases.  The phenological stages of many agricultural field crops (including cut flowers) are frequently identified using the BBCH-scale (Biologische Bundesansalt, Bundessotmenamt und CHemische Industrie). This scale was developed about 70 years ago by four Germain chemical companies to provide farmers with better guidance relating to the application of fertilizers and pesticides. It's not the only developmental  classification system, but it is evolving into the most widely used. The BBCH-scale  provides  a common way to refer to plant development for both research and crop management. 


 Sweet Corn.  Source: publicdomainimage.net
In addition to phenological scales for crops, many scales have also been developed for both   beneficial and pest insects,  the emergence of unwanted plants, i.e. weeds, and even plant diseases.  These data  can be quite detailed  as  a chart for a tomato available from Wikipedia shows, but farmers don't need to track  every stage. They  just need to determine the key developmental stages for their  crops or to know when their favorite pest will appear.

And regarding pests, Cornell's website, Network for Environment and Weather Applications,  offers data on pest forecasts, DDs in general, and crop management along with detailed  pest forecast models specifically  for   sweet corn, tomatoes, apples and grapes.  Another resource from the same website, and a favorite of mine, is the Soil Temperature Map which provides temperatures at a depth of 2" across New England and the Atlantic Region states.  This is useful if you want to gamble on getting a head start on the season and are looking for validation of your soil temperature readings.


Sweet Corn. Source: Ohio State U. Small Farms
The  chart to the right  from Oregon State University's Small Farms website  for  sweet corn  clearly shows how the the crop's development varied in  different growing seasons because  the DDs needed for each stage accrued at different rates.

The Oregon SU chart provides any farmer with information about when sweet corn will be at a given stage by tracking DDs, but farmers need to track Growing Degree Days for their current year in order to manage their crops effectively. They can do this either by tracking daily temperatures themselves or by obtaining data from other sources.  The challenge  is to get current local data because temperatures vary within a region or even from field to field. Some Cooperative Extensions, including Cornell,  attempt to do this by offering data from a network of  weather stations and letting growers choose which station's data to use.


Wonkish Break #2:   What is a Growing Degree Day (DD)? It's just a practical way to count the amount of daily solar heating without dealing with any actual physics.  There are at least six  formulas for calculating DDs. Each one attempts to accommodate temperature fluctuations within a given day. The most popular one, shown on the left,  is referred to as either  the "simple average" or "single sine" formula. The Max  and Min Temps for a day are added together, divided  by 2 and then the Base Temp (the minimum temperature needed for  plant growth) is subtracted.  The result is a number that represents  a day's heating factor.  By adding these daily heating factors together  and comparing it with the plant's  phenological profile  matched with DD data, growers can predict within a couple of days when a crop will reach its next stage.  


Cornell University's Climate Smart Farming website provides  New York farmers with local DD data. Among the online tools available from the website is a  Growing Degree Day Calculator. By locating your property on its "Change Location" map  and entering a crop's planting date, the calculator will show you how DDs have accrued since your planting date as well as with  a 6 day forecast.   Two other useful tools available from this website include a Water Deficit Calculator and a Cover Crop Tool for Vegetable Growers. Of a more speculative bent, you can also get a projection for the outlook of the  entire current growing season.

Managers of commercial greenhouses, where  growing environments are carefully regulated, actually can  target particular dates for budding, flowering, fruiting etc.  Farmers in the real world outside of the greenhouse, of course,   control  fewer  environmental factors; but it enables those growing large field crops, grapes or  tree fruits and nuts to keep track of crop development in the farthest back-forty. Until recently phenological charts for vegetables and accompanying  DD data have been hard to obtain. This is starting to change as the Oregon and Ohio Cooperative Extensions' websites indicate,  but persistent Internet digging  is required to find DD data for many vegetables.  Vegetable growers, it seems, need to be ready to develop their own phenological charts and match it to DDs in order to make more extensive use of this technique. [This can be fun for those of us with obsessions about vegetables.] A good place to locate at least BBCH-scales for some vegetables is  Oregon State's  Croptime - Growth Stage Guide.  Charts combining developmental stages and DDs focussed on pest emergence and diseases are  readily available.  

And remember...

"Curiosity is more important than knowledge." - Albert Einstein


HOW TO PROTECT SEEDLINGS FROM DAMPING-OFF

Probably a lot of backyard  gardeners by now   have put seeds in pots, trays or some other kind of container. After anxiously waiting for the little sprouts to poke out of the soil, they are excited to see the first two leaves open, the cotyledons. The gardeners provide a little more water  and  maybe rotate the trays so that the new sprouts share the light.  Like the gardeners, the new sprouts must be  happy. What could possibly go wrong?  

Damping-off. Source: Cornell University 
There's actually a lot,  but most probably  a gardener will go down into their cellar or out onto an unheated sunroom one morning to check on the seedlings and find them sprawled over  with their stems looking pinched and maybe their leaves starting to look discolored.   Pulling up one of the shoots the gardener notices that its roots have not developed very much. What happened?

Looks like damping-off (or damp-off)  to me. 

Damp-off is  typically  caused  either by one of two fungi:  Fusarium spp. and  Rhizoctonia spp. or by a Pythium spp. ["spp" stands  for subspecies]. The latter is a water mold and is recognizably distinctive  because of its tiny white filaments. A microbiologist would say that it's distinguished  from fungi by being diploid (i.e. having 2 sets of genetic material rather than  being haploid like fungi with only 1 set). The two fungi may or may not appear with some kind of obvious fuzz, but infected plants will show various discoloration, and sometimes seeds will not even emerge from the soil.


Damp-off in early spring garden.


All these pathogenic critters are generally present in garden soils just waiting for the right conditions, like the ones some gardeners inadvertently  provide, to spring into action.   The pathogens do not normally have much impact on maturer plants, but they can. For example, the Irish Potato Famine was caused by a water mold (Phytophthora infestans). It commonly shows up at the end of  summer or during autumn as "late blight" when the weather turns cool and  wet.

Gardeners may not  care much about whether  a fungi or a water mold  did  in their  tomato seedlings, but they do need to know how to avoid the conditions that trigger "damp-off." The peppers in the pot of the first photo either were not in a sterile pot  or in sterile  garden soil, perhaps both. The second photo shows the result of someone in a hurry to get seed in the ground and not waiting until the soil was a little drier and/or and a little warmer,  On the other hand, maybe that gardener was just unlucky and hit a really bad streak of spring weather. Obviously, gardeners cannot control the weather, but here's what they can do next time to reduce the risk of pathogens from winning.

  • Clean gardening tools and wash your hands before handling seeds or seedlings if you have been handling unwashed tools, pots and other containers.
  • Use a heat mat under your tray or pots to keep soil temperature in the low 70s° F.
  • Invest in sterile starter or planting soil.  Don't use soil from the garden.
  • Wash and sterilize  trays and pots before use. Soak'em in a 10% solution of household  bleach.
  • Don't overwater and make sure pots and other containers have drainage holes.  Seedlings  like to be moist, but not drowned.
  • When watering, use  warm tap water to promote root growth. Roots do not enjoy  cold baths.
  • After the first 2 - 4 true leaves develop (not the very first 2 leaves, the  cotyledons), recheck the potting mix's label because  many starter mixes contain slow release fertilizers at the right strength.  If they do, don't fertilize.  If you have to add fertilizer, then add it at no more than 1/4 strength.  
  • Look for excessive condensation on the inside tray or container covers. If moisture is dripping down, remove the covers, shake off the condensation and allow for more air flow. 
  • Provide 12-14 hours of light each day from either a soft white fluorescent bulb or a grow light. 

Remember that you are creating  a  nursery for young plants, and the seedlings will benefit from whatever  head start you take care to provide...


MAY - GARDEN PREPARATION

Another month and another opportunity  to add to your guilt load with more gardening  reminders.

May  is the "do everything month," weather permitting of course. At some point in May you  might find yourself having to transplant, seed, fertilize, thin, weed and maybe harvest.  Although the "new" average date of the last frost  of the season according to New York State's Dept. of Environmental Conservation is now May 2  for much of Rensselaer County (excluding the higher elevations like the Rensselaer Plateau), gardeners need to monitor projected weather forecasts closely to plan their gardening activities because temperatures and weather can still wildly fluctuate.  So here is a little more about about some of those things you might find yourself doing...

  • First, is your garden soil ready for action?  Take its temperature.  Cool weather veggie seeds can go in the ground when the soil nears 40° F, but the soil should not be saturated.  The soil's moisture content is okay if, when you scoop up a handful, it does not remain in a wet clump in your hand, but looks somewhat like  a cup of streusel topping for coffee cake.  
  • If you have started cool weather veggies indoors (cabbage, broccoli, lettuce, etc.), you can  either  start  to "harden" them off outside   or to set them directly into the garden or into cold frames, cloches or row covers.  Hardening is really more about strengthening plant stems by exposing them to a little wind than it is about conditioning them to cooler temperatures.  In early May when it's sunny I simply  move my trays of seedlings into the garden  each day, then return them to the shelter of my cellar for the night.  
  • If you haven't already planted seeds in the garden in early May, you can still put in  a  planting of cool weather veggies. Peas, radishes, chard and lettuce have a good chance of beating July's heat. 
  • And, if you were able to sow seeds last month, it may be time  to thin them. It may also be time to cultivate/weed those rows.
  • Your early diligence of March and April might now be rewarded in late May by  your being able to harvest spinach, lettuce, radishes and peas. This is especially true if you used cold frames, cloches or row covers to get the first crops started. 
     Typical slug.  Source: University of MN

  • Unfortunately, as temperatures in May warm it is also  time to  start looking for slugs, cutworms and aphids.   Slugs are unsegmented invertebrates.  They look like snails without shells and are most active at night. Although you can  find them on the underside of leaves on some days, they like cool, moist weather and tend to shelter under thick mulch, bark, boards etc during bright sunny days.  I have noticed  in recent years that slugs  have become a common  pest in my garden. The slugs  feast on my young lettuce, cabbage and Swiss chard. I have tried  using diatomaceous earth  to control them, but  recent springs have been wet and cool making diatomaceous earth  less effective. I've also used half buried water bottle traps baited with beer. The slugs like the beer and drown happy, but beer's evaporation means that I have to replenish the beverage in the bottles frequently.  I now just keep a container of soapy water in the garden and do a slug patrol every morning.  This seems to work best in my small kitchen garden.  

    Black cutworm. Source: Clemson U.
  • Cut worms are another enemy you will encounter  when you set out seedlings. There are many kinds of them -- they are typically soil colored  ranging from tans  to  dark grays with  some sporting occasional   darker streaks.  Slugs seem to take up residence in the soil near wherever you plant your seedlings.  If you notice a young plant cut off as shown in the photo, you can probably locate the villain by scratching around the base of the plant.  Backyard gardeners can protect their young plants by placing a  collar around the base of the plant and inserting it about 1" into the soil.  When I was growing up, we used pages from the  Sears & Roebuck Catalog cut into strips to protect our cucumbers and melons.  Now, I cut circular collars  from yogurt cups.  


    Aphids.  Source: Cornell U.
  • Finally, aphids will start appearing from mid to late May.  These little fellows are sort of pear shape, frequently are green or white in color and usually smaller than a pinhead. Look for them on the underside of leaves.  They are true bugs in that they poke  holes in a plant's stem or its leaves and suck the sap.  Healthy plants usually are not affected too much, but aphids are attracted to overcrowded or otherwise environmentally stressed plants.   However, their piercings can introduce viruses into  a plant.  Their natural predators include ladybug lava and lacewings, but aphids' ability to procreate exponentially  tends to outpace  predator appetites.  If you need to intervene, you can spray a mild soapy solution on the plants, remove them by hand or simply hose them off. 


And remember...

"Gardening is learning, learning  learning." - Helen Mirren, British Actress


GARDEN PREPARATION: APRIL


Garlic getting a head start.
SPRING - To see daffodils blooming, garlic sprouting, weeds awakening and woodchucks  roaming  does remind me that some things still seem to be mostly predictable in this world... 

I had almost become reconciled with the idea that I would not be be able to start  tomatoes and peppers under my cellar's grow lights  when three weeks ago my spouse and I decided to cancel our spring travel plans.  With our trip canceled thanks to the COVID-19 pandemic, I now find myself anxiously waiting for a shipment of last minute ordered seeds to arrive so that I can get back to a familiar task.

And, between a few early spring showers I have also been able to spend some of my hunker down time in the garden.  I have been able to move mulch around on planting beds to expedite the soil's warming, relocate trellises and frames for cucumbers and peas and to finish spreading compost.  Each of these activities make me realize how fortunate I am to have a vegetable garden to work in; but in case  you have a slightly neglected vegetable patch, here are a few things you can do that might make you feel slightly less squirrelly:

  • Get outside! Finish spreading your compost or spading  the remains of last fall's cover crop into your planting beds.
  • Check your soil's temperature and moisture level. Your soil might feel warm enough to the touch, but it's better to stick a thermometer into the ground to check it. Remember, also, that soil tends to be  quite wet in early spring. Pick up a handful; and if it slowly crumbles like a strudel topping on muffins when you open your hand, then it's okay for your precious seeds.
  • Finally,  give in to that urge to plant something. Although early April is still pushing it for most spring vegetables in the Capital District, you can sow peas and spinach.  Just hold off on the radishes, lettuce and beets until at least mid April. But, gardeners beware - because although  it is true that the last frost of spring has been moving to earlier dates in May, the average date of the last frost for our area remains May 15.  Keep your row covers handy!


WANT TO BECOME A MASTER GARDENER?


A Master Gardener gives planting tips at a Demonstration Garden
Nationally, there are nearly 100,000 active Master Gardener volunteers  contributing over 5 million service hours annually throughout all 50 of the United States. If you would like to join the ranks of these happy folks, here's your chance.

The first step in becoming a Master Gardener involves your contacting the Master Gardener Coordinator for your county to schedule an interview.

The second step is completing  60 hours of classroom instruction on gardening and related subjects taught by Extension Educators and other experts.

The final step upon class graduation involves your volunteering in various ways in your communities. This  may include such activities as leading or participating in local gardening projects such as Demonstration Gardens, answering gardening questions at Extension Hotlines or making presentations to various community groups such as local garden clubs. 


Don't wait.  The  next training class will be held between September and December, 2020.  The deadline to apply for an interview is in early summer.


For more information, contact the Master Gardener Coordinator listed below for your county.

        RENSSELAER:  David Chinery, (518) 272-4210 or dhc3@cornell.edu

       ALBANY:  Carole Henry, (518) 765-3500 or ch878@cornell.edu

       SCHENECTADY: Angela Tompkins, (518 372-1622 or amj22@cornell.edu

       COLUMBIA-GREENE: Donna Peterson, (518) 828-3346 or dmp234@cornell.edu


And remember...

"Gardening is cheaper than therapy and you get tomatoes." - unknown


APRIL - GARDEN PREPARATIONS

Source: Ulster County CCE
Here we go again with another annoying post about what you should or can be doing now for vegetable gardening...
  • It's finally time  to start your warm weather vegetables indoors.   Remember these seeds like starting soil temperatures of  at least 60°F, but between 70°F and 78°F is what  tomatoes, peppers, eggplants etc. really like.  
  •  If you have already started onions,  kale, cabbages, broccoli, and Swiss chard, you can set these out.  Place the leeks in a trough so that you can fill in around them as they grow to blanche the stalks. Lettuce can also go out, but it  may need protection against drastic temperature drops - do you have a cold frame or cloche? 
  • It's not too late for peas, parsnips, radish, and spinach seeds to go in the ground. 
    Source: U. of Maine Extension
  • Now is also the time to plant new dwarf fruit trees in your yard. Get them started now if you didn't buy and plant them  last year - you won't get fruit for a few years or so anyway.    Look for the graft line on the stock and make sure to  plant it at least 2 inches above  soil level or you may discover you have a full size standard specimen in 10 years... The Cornell Guide to Growing Fruit at Home will answer all the other questions you might have about turning your yard into an orchard.
  • It's also a good time to add any compost or peat to the garden. Better to work it into the soil now then when the garden is half planted.  I find this is easier to do  using raised beds or raised rows, than digging a trench,  mixing in amendments and refilling the trench.  If your soil is compacted, do not just dig a small hole  and mix in soil  amendments for a single plant.  The plant's roots will probably stay confined to the hole. [Although digging a very wide hole would be okay, but raised beds or rows are an easier approach.]
  • REMEMBER to label your rows and beds...  AND,  label those seeds you are starting in the cellar or in the sun room.  

What to start seeds in? 


We've mentioned before that having heat mats and grow lights are very desirable items for starting plants indoors. If you have a small garden plot, however, these items entail a significant investment  that might seem like  an indulgent luxury. A single 4 foot grow light, a heat mat and  a timer  can easily cost between $150 and $200. You can also create your own grow light system by  using a regular fluorescent fixture and rigging an adjustable suspension system for it.  It's almost as good as a gold standard model.

Source: Johnny Select Seeds
If you can keep your set up out of the cellar, (say, someone gives you  permission to have it  in the living room) you can dispense with the heat mat, but a grow light really is worth its cost. Planting trays and containers or pots are areas where you can economize. I tend to use large 3 1/4" pots that allow me to grow 24 tomatoes under a grow light. By using smaller pots you could double or triple that number, but you may need to transplant  your children  before relocating them to the great outdoors.

Container options include everything from  compressed manure or peat pots, plastic trays of small plug cells in various sizes  up to 200+ seedlings, to thin plastic cells in the popular 6-pack format. Of course, paper cups will also serve the purpose. Because I sometimes exhibit very frugal behaviors,  I  continue to look for and pick up  containers abandoned by other gardeners. This has allowed me to avoid buying starting pots of any kind for years.  I have also saved and used small yogurt cups  for pots. They work well, but you need to make  drainage holes in their bottoms.


6 pack cells

Compressed peat or manure pots

Some gardeners, whom I know, like  using compressed manure or peat pots, but I'm sort of neutral about it. Their advantages include  reducing the risk of damaging fragile young roots during transplanting and decomposing over the course of a growing season.  The downsides are that 1) it is important that no part of these pots  be exposed to the air because the compressed peat or manure sides can wick volumes of water away from the your seedlings; 2) if you do not keep your garden well watered and the pots moist, the roots of your seedlings may   have difficulty piercing the dry pot sides resulting in stunted plant growth; and 3) you have to buy them every year.


200 cell plug tra
Some kind of leak proof tray for holding your plant containers is essential because the containers have to be able to drain and/or absorb water.  Disposable aluminum baking sheets can also serve the purpose, but  they are too flexible  for easily moving the plants around.  Some of the commercial plastic plant trays are not  very sturdy either -- look for trays that have reinforced bottoms! If you decide to use commercial plant trays, consider also obtaining the clear domes (i.e. covers) for them.  


Clear dome cover for plant tray

typical leak proof tray
The domes  help maintain the temperature and restrict moisture loss while your seedlings are small. They are commonly available in two sizes: 2" and 7" heights). I have also  used the clear plastic bottoms of salad boxes from grocery stores for this purpose. Once your seeds have sprouted, it is important to monitor how tight the covers need to be on the trays.  Keeping the environment under a dome too moist can promote the growth of molds and lead to problems. I use  2" domes and just prop up the domes as the seedlings grow.  When the seedlings get to about 4" in height, I remove the domes.  


Now, get going... 


Plant Pathology - Abiotic  Distress


A young pepper in distress from cool temperatures.
Recently, we enumerated the common causes of plant diseases in a post entitled  Plant Pathology. Now,  in keeping with the morbid greyness of November, we'll briefly review the character and sources of  "non-disease-related" problems.

Every gardener has encountered a sick looking plant. Some morning you cheerfully get up, grab a cup of coffee and then look at your flower box on the windowsill or maybe step into your sun porch to greet the newest pepper sprouts or marigolds and discover that overnight one, or some, suddenly are, to put it gently, 'failing to thrive.'   

What happened? Who did this? Don't jump to conclusions.

A  first reaction might be to think that some sneaky microbial pest has contaminated your private green domain. The plant  appears "sick," i.e. in some kind of  distress, but it may not be diseased; and the symptom appearing in front of you may be signaling a problem actually orginating in a different part of the plant. The plant's distress might not be caused by some other living thing at all...

Abiotic factors account for a lot more plant problems than you might think. Some experts attribute abiotic issues  as accounting for about 50% of plant problems while a few contend that it might be as much as 80%!  Many abiotic problems are readily remedied (or entirely avoided) by applying simple, good gardening practices - maintaining moisture levels, cultivating regularly to promote aeration and drainage, thinning plants, weeding etc. Some abiotic problems,  such as nutrient deficiencies, are harder to diagnose and require more time to correct; and some, like drought or monsoons, may not have readily available solutions. In my admittedly limited experience, containers, i.e. pots of any size or shape, seem to be prone to abiotic problems: they heat up and dry out fast,  salt residues from old fertilizers or hard water build up and soil fertility declines because soils or nutrients are not  replenished on a regular basis.  So - if you use a lot of containers, it's important that you be alert to the range abiotic problems that might develop.

Types of Abiotic Problems


Abiotic factors fall into several rather distinct, but unsexy,  categories:

Mechanical - These typically are simple breakages or abrasions that are usually caused by wind, hail, dogs, cats and other animals including small children.  [Tiny punctures in leaves or missing leaf tissue, however,  suggests some kind of  pest has been free loading.]

Beans showing some yellowing leaves.
Photo: NYSAES Geneva, NY
Chemical -  Nutritional deficiencies and toxicity frequently show up with disease-like symptoms. Too much of a good thing like fertilizer,  or, as in cases like road salt or pesticides - just a little too much of a bad thing, can cause yellowing (chlorosis) to varying degrees; but yellowing  can also  indicate  viral and bacterial  infestations.

How toxicity shows up depends upon whether a chemical is  absorbed by a plant  or comes into  direct foliar contact with some part of it, e.g. via careless spraying.  In the former case, symptoms may be general in nature, e.g. wilting or poor new shoot development; in the latter, leaf discoloration along with dead spots can rapidly occur.


[See earllier posts:  Macronutrients and Micronutrients about plant nutrition and how to recognize possible deficiences.]


Environmental - Plants, like many of us, typically do not respond well to sudden changes in their environment.  Temperature extremes, lighting,  air quality, oxygen and moisture levels will manifest themselves in various ways such as wilting, leaf drop, lack of flowering, inferior fruit, slow growth etc.  Note: oxygen and moisture levels can be related -- saturated soil that does not drain well will leave roots suffocating and that in turn can cause leaves to wilt, develop marginal browning and eventual dropping.  [And, of course, with respect to roots attacks by parasites and nematodes can also induce similiar symptoms.]  

Factors to Consider in Evaluating Problems


A wilted plant in a dried out pot is clearly distressed and easily resurrected by restoring the soil's moisture level, but a plant showing yellowing leaves as in the bean plants depicted above requires a more  systematic analysis to determine the cause.  Yellowing  leaves can be arise from a variety of factors:  nutrition, environment, parasites, fungi, bacteria,  viruses etc.

So after getting over the shock that your beloved rutabaga looks under the weather, switch on your situational awareness circuit and look at the unhappy specimen in front of you with an open mind and  begin thinking about  at leas some of the following before deciding on a  course of action:

  • Does the symptom appear to be confined to just one plant, or are other plants also affected? 
    • If more than one plant seems afflicted, is the symptom confined to a small area in your garden involving just a few plants or does it appear in a wider area? [Abiotic problems tend to be uniform in character and, in a garden setting, usually show up aross a wide area and are not limited to just one or a few plants. In fact, different types of plants may be affected.  Keep in mind, however,  that if you see multiple symptoms, there is a good chance that you may be dealing with multiple problems. ]
  • If lately  you've been suspicious about the health of a plant, does the symptom seem to be changing over time?  
    • Is the symptom spreading on this plant or are other plants showing lesser or greater degrees of the symptom?  [If yes, this implies a biotic cause.]
    • Is just a specific variety of plant affected? [If yes, this also implies a biotic cause.]
  • What part of the plant is affected?  Look at the whole plant -  check its stems, leaves, roots, blossoms, fruit. 
    • Where is  the symptom located:  low or high on the stem.  
    • Does the symptom appear to be confined to leaves, stems, blossoms or just to the tissue between leaf veins? 
  • Consider the plant's setting. 
    • Is the soil compacted,  loose, wet or dry;
    • How much sunlight does the plant really get;
    • Is the plant crowded? [Did you forget about thinning to the recommended spacing...]
    • Has the weather been hot or cool?
    • Are leaves or fruit touching the soil or other plants?
  • If you are thinking that an insect or similar  pest is responsible, look on the underside of leaves and on stems for egg or spore clusters or  frass.  Snails (mullusks) may have left slime trails in their  retreat to a secure, remote daytime location.
  • Finally, do you remember anything about  last year's garden problems?   Is what you are seeing  similar to anything that occured last year? Both abiotic and biotic problems tend to recur especially in small gardens.   

Be Your Own Plant Dr.


For gardener's who would like to minimize their reliance on the Internet and use a book to solve their plants' problems, I recommend "What's Wrong With My Plant (and how do I fix it?"   by David Deardorff and Kathryn Wadsworth (Timber Press, 2009).  The book served as one of the texts for my Master Gardener training program. The first half follows a decision tree format employing exceptionally  clear illustrations  -   you start with a symptom and then choose the next refining step from a choice of equally clear illustrations with accompanying text.

The second half of the  book discusses the diseases and disorders in detail as well as organic remedy options.  Deardorff is a plant pathologist at the U. Hawaii and serves as a consultant to the U. of Washington's Extension Service. The co-author is a professional photographer.  Both hardcover and paperback editions are available.


And remember:

"My green thumb came only as a result of the mistakes I made while learning 
to see things from the plant's point of view." - H. Fred Ale


JUNE - GARDEN PREPARATION

Another month and still lots of garden  work to do [depressing sometimes thinking about it, isn't it], but some of us are near to or maybe already enjoying our  first harvests and breathing sighs of relief as early sowings  finally  emerged  and started to grow. In Rensselaer County, according to Cornell data, our growing degree days  finally  reached their recent 15 year average levels around May 7 after lagging behind  10 - 12 days from recent  years. In short, April  and early May stayed darn cool.

Sugar snap peas - still catching up from a cool May
The peas I planted April 8 when the soil temperature registered a promising 47°F  and with an all too   optimistic forecast of continuing warmer seasonal temperatures finally  emerged on May 3. Their germination  hesitation caused by almost 3+ weeks of very cool temperatures  with essentially no accrual of growing degrees. When the seeds did germinate  after several unusually hot days at mid-month, air temperatures promptly retreated and hovered  in the 40 - 50°F range. My  peas are just now deciding to catch up. The other cool weather plants that I set out  later in May to make room in  the cellar  for my happily growing tomatoes and cucumbers  also persevered and are finally  now  starting  to  show signs of responding positively to being in the great outdoors. On the plus side for this spring's weather is that both weeds and insect pests seem also to be emerging late.

So much for last month, now moving on to June...


    Rhubarb, a vegetable that used in pies goes well with vanilla ice cream.
  • If you're luckier than me and happen to live in a warmer nook of Rensselaer County, you might be harvesting spinach, lettuce and radishes by now. So far, I am just limited to relishing my rhubarb and horseradish...
  • Assuming you may have already planted some bush beans, beets, and squash at the end of May, you should think about follow on plantings of the same.  If you've just planted these fellas, wait another 10 - 12 days, then plant more. It's almost guaranteed, that whenever you sow seed or set out plants that   bumper crops will be ready for picking back home  on the third day of your long awaited get away to Nantucket... Don't worry about it. Be generous and ask a neighbor or friend to enjoy your harvest and maybe also to water your garden too as part of the deal...
  • Early June is also the time to set out the full complement of  warm weather veggies: basil, tomatoes, eggplant, cucumbers, peppers etc. for harvesting  later in August and September. Thanks to less disciplined gardeners than ourselves,  big box stores and nurseries might be sold out of these plants by early June, but local farmer markets will probably continue to offer a wide variety stock - and probably better acclimated stock.  
  • The next suggestion might seem slightly depressing, but later this month is also  time to start seedlings for late summer or autumnal   bounty.  Pick your favorite cabbage family member - cabbage, broccoli, kale etc. and get started.  
  • Follow on plantings of lettuce, however,  are a special case. Start mid-summer varieties such as Starfire (a green leaf),  Sparx (a Romaine heart)  or Adriana (a green butterhead) now. These can probably be sown   directly in the garden because it's still (hopefully) not too hot.  For late season lettuces  such as Miro (a green butterhead), Skyphos (a red butterhead) or Green First (a green Romain) you need to wait until mid or late July and start them indoors where it's hopefully cooler.  The heat tolerance of lettuce is relative.  The mid and late season varieties are a little less likely to bolt as quickly as early season types, but no lettuce really likes summer. For these follow on plantings you may need to provide a sun screen if you don't have a partially shaded garden area for them.  Direct seeding of lettuce during July and August is frequently not successful because the seeds  respond to high soil temperatures by going dormant for the rest of the season.
  • On an even more  depressing note, the next topic is WEEDS...  Where to start? By June many weeds are already well underway.  For gardeners with only a couple of small raised beds, weeds are no big deal - although for all gardeners they are like proverbial dragon's teeth  poping up overnight every night.  Mulching,  fabric cloth, and hand tilling  probably effectively   manages them for most of us.  Controlling weeds organically in larger gardens and in field environments  is more challenging due to scale - just ask any grower at your local farmer's market on Saturday. For those gardeners wanting to know what weeds they are pulling and wishing to expand their garden libraries, books identifying weeds are as multitudinous as weeds!  For our neck of the woods, Weeds of the Northeast (1997) is the classic and still remains in print from Cornell University Press.  Of course, a Google search using the phrase, "weed identification pictures" probably serves the ID purposes of most gardeners.  And for those few gardeners  who may want to pretend to be botanists, a source  providing a botanical approach to weed identification is  Weed Identification Tools and Techniques from Virginia's Extension Service. This doesn't tell you what your weed is, but instructs you how to analyze your mystery plant like a pro.  If you still remain stymied, send a photo via email or  bring a specimen of the plant to your county Extension  office for identification.  As a final note about weeds, perhaps the ultimate solution is to eat them.  For an interesting list of what's edible beyond dandelions, purslane and (maybe) garlic mustard, checkout the  Edible Wild Food site. 


And remember...

"Weeds are flowers too, once you get to know them." - A. A. Milne